
A Foolproof, Low-Stress Risotto You Can Make Any Night
Risotto, Without the Stress
Risotto has a reputation: fussy, time-consuming, and dependent on endless stirring. For many home cooks, that reputation is enough to keep it in the “restaurant-only” category. But it doesn’t have to be that way. With a few smart steps—and a method that relies more on timing and heat control than constant babysitting—you can make a creamy, satisfying risotto that feels both comforting and special.
This approach focuses on a streamlined process: warm your broth, build flavor with onion and butter, toast the rice briefly, then let the pot do much of the work. The finish is classic and simple—Parmesan, black pepper, and a final bit of butter—creating a dish that’s as reliable for a quiet dinner as it is impressive for company.
What Makes This Method “Foolproof”
The key to a more relaxed risotto is understanding what actually needs attention and what doesn’t. Traditional advice often emphasizes constant stirring and adding hot liquid in tiny increments from start to finish. Here, you still stir at important moments, but you also take advantage of a covered simmer to move the cooking along without hovering.
The method can be summed up in a few principles:
- Keep the broth warm and ready so the rice stays at a steady cooking temperature.
- Toast the rice briefly in butter and aromatics to build flavor and set up the texture.
- Use a mostly covered simmer with a larger addition of broth to reduce the need for constant stirring early on.
- Finish with smaller additions only at the end, when you’re dialing in tenderness and creaminess.
- Enrich off the heat with Parmesan, black pepper, and butter for a smooth, glossy finish.
It’s still risotto—creamy, rich, and spoonable—but the process is more approachable, especially if you’ve been “scared of all that stirring.”
Start With Warm Broth (This Matters More Than You Think)
Before you begin cooking the rice, set yourself up for success by preparing the broth. Add your chicken broth (store-bought or homemade, and preferably low-sodium so you can control seasoning) to a pot and bring it to a simmer. Once it’s steaming, reduce the heat to low, cover it, and keep it warm.
This step is simple, but it’s foundational. Warm broth helps the rice cook evenly and prevents the temperature swings that can slow down cooking or affect the final texture. It also makes the whole process feel calmer—your liquid is ready the moment you need it.
Build Flavor in the Pan: Butter, Onion, and Salt
In a large skillet, melt butter and add finely chopped white onion along with some salt. Cook, stirring occasionally, until the onion is soft and translucent. This is your flavor base: buttery, gently sweet, and aromatic. The goal isn’t browning; it’s tenderness and a mellow onion flavor that will carry through the dish.
Using a large skillet gives the rice room to cook evenly and makes stirring easier when you do need to stir.
Toast the Rice Briefly—No Overthinking Required
Once the onion is soft, add Arborio rice to the pan. Toast it for a few minutes in the butter and aromatics until it’s lightly toasted and translucent around the edges. This is not a long, aggressive toast—think of it as a quick warm-up that coats the grains in fat and starts building the risotto’s signature texture.
The guidance here is refreshingly practical: you don’t need to go crazy. You’re just lightly toasting.
Deglaze With White Wine and Stir Until Absorbed
Next comes white wine. Add it to the pan and stir to combine. Cook—stirring—until the liquid is fully absorbed. This step adds brightness and complexity, and it also helps lift flavor from the pan into the rice.
Absorption is the cue to move forward. Once the wine is gone and the rice looks cohesive again, you’re ready for broth.
The Low-Stir Secret: Add Most of the Broth, Cover, and Simmer
Here’s where this method breaks from the most intimidating versions of risotto. Instead of adding broth in tiny amounts from the start, you add about three-quarters of the warm broth, cover the pan, and let it simmer for 10 to 15 minutes. During this time, the rice cooks until it’s just al dente.
Covering the pan helps the rice cook efficiently and evenly, and it reduces how much active stirring you need to do in the early stage. You’re still cooking carefully, but you’re not chained to the stove.
After 10 to 15 minutes, check the rice. You’re looking for “just al dente”—a little firmness left in the center—because you’ll finish cooking it uncovered with the remaining broth.
Finish Uncovered: Add Remaining Broth in Smaller Amounts
Once the rice is al dente, uncover the risotto and begin adding the remaining liquid about a half cup at a time, stirring until it’s absorbed. This final stretch is where you fine-tune the texture: creamy, tender, and cohesive, without being soupy or stiff.
The good news is that this stage should only take a few more minutes. Because the rice has already done most of its cooking under the cover, you’re now focused on bringing it to complete tenderness and the consistency you want in the bowl.
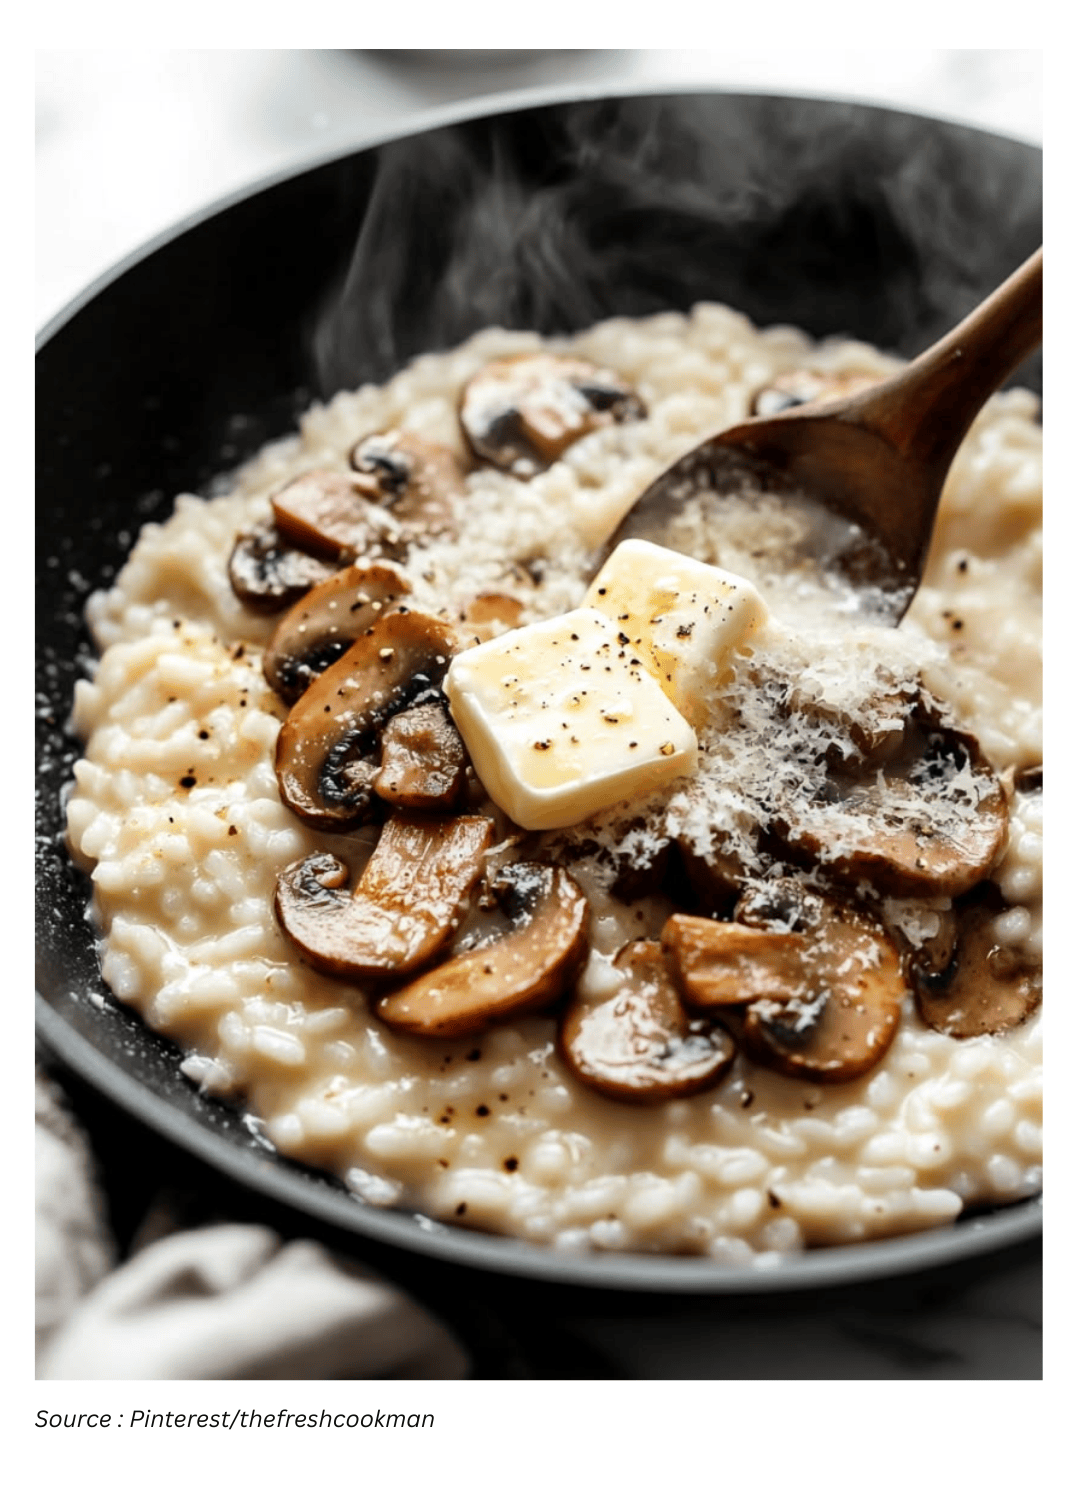
The Classic Finish: Parmesan, Black Pepper, and Butter
When the rice is completely tender, remove the pan from the heat. Add grated Parmesan, black pepper, and the remaining butter. Stir until the cheese and butter melt into the rice, creating a smooth, creamy finish.
Then taste and adjust seasoning with more salt and pepper as needed. This last step is small but important—especially if you’re using low-sodium broth, which gives you more control over the final balance.
Why This Risotto Works for Both Weeknights and Special Occasions
Part of risotto’s charm is how it can feel like two things at once. On one hand, it’s a comfort-food staple: warm, creamy, and deeply satisfying. On the other, it reads as a “fancy” dish—something you might order when you want dinner to feel like an occasion.
This method supports both realities. It’s straightforward enough to make without dread, but the end result still has that classic risotto appeal. If you’ve avoided risotto because you were told it’s easy to mess up, this approach is designed to be approachable and repeatable.
As one home cook put it: “First time making risotto and everyone loved it, including me! I was impressed with how easy this recipe was to follow since I've always been told this is an easy dish to mess up. I'm looking forward to trying it again soon!”
Ideas for Toppings and Pairings
A classic risotto is a versatile base, and it plays well with a wide range of proteins. Seafood is a natural match, but you have plenty of options depending on what you’re craving or what you have on hand.
- Seafood: shrimp or lobster
- Meat: chicken or sausage
- Vegetarian-friendly: mushrooms or beans
For sides, risotto benefits from something lighter and vegetable-forward to balance its richness. Consider pairing it with salads, oven-roasted asparagus, or a Brussels sprouts preparation in the cacio e pepe style.
Variations You Can Build From the Same Base
Once you’re comfortable with the core method, it becomes a template for countless variations. The technique stays the same; what changes is what you fold in or serve alongside it.
- Mushroom risotto: add mushrooms for an earthy, savory direction.
- Shrimp risotto: lean into seafood for a classic pairing.
- Pumpkin risotto: a seasonal variation with a fall-leaning feel.
- Vegan charred lemon-asparagus risotto: a summery, plant-forward option.
These variations highlight why learning a dependable risotto technique is so useful: one method can support multiple moods, seasons, and menus.
Storing, Reheating, and a Smart Leftover Upgrade
Risotto is best right after it’s made, especially for texture. That said, while the creaminess is at its peak on day one, the flavor can still be excellent on days two and three. Store leftovers in an airtight container in the refrigerator.
To reheat, warm it gently in a covered container in the microwave. Keeping it covered helps it heat more evenly and reduces drying.
If you want to turn leftovers into something that feels entirely new, there’s a classic move: roll the chilled risotto into rice balls and transform them into arancini. It’s a “real treat” approach that makes day-two risotto feel intentional rather than incidental.
Ingredients Mentioned in This Approach
The full list of ingredients and step-by-step instructions are typically presented in a dedicated recipe format, but the core components referenced in this method include:
- Arborio rice
- Low-sodium chicken broth (store-bought or homemade)
- Butter
- Medium white onion, finely chopped (about 1 1/2 cups)
- White wine
- Parmesan, finely grated (about 1 1/2 cups)
- Black pepper
- Salt (to taste)
A Practical Mindset for Risotto Success
If you take one thing from this method, let it be this: risotto is less about frantic stirring and more about paying attention at the right moments. Warm your broth, toast the rice lightly, let it simmer covered for the bulk of the cooking, then finish with a few careful additions and a rich, classic stir-in of cheese and butter.
The result is a creamy risotto that’s simple to prepare and rewarding to eat—comforting enough to rely on, and polished enough to serve when you want dinner to feel special.