
Chocolate Molten Lava Cakes: A Rich, Romantic Dessert That’s Easier Than It Looks
A dessert that feels decadent—without being complicated
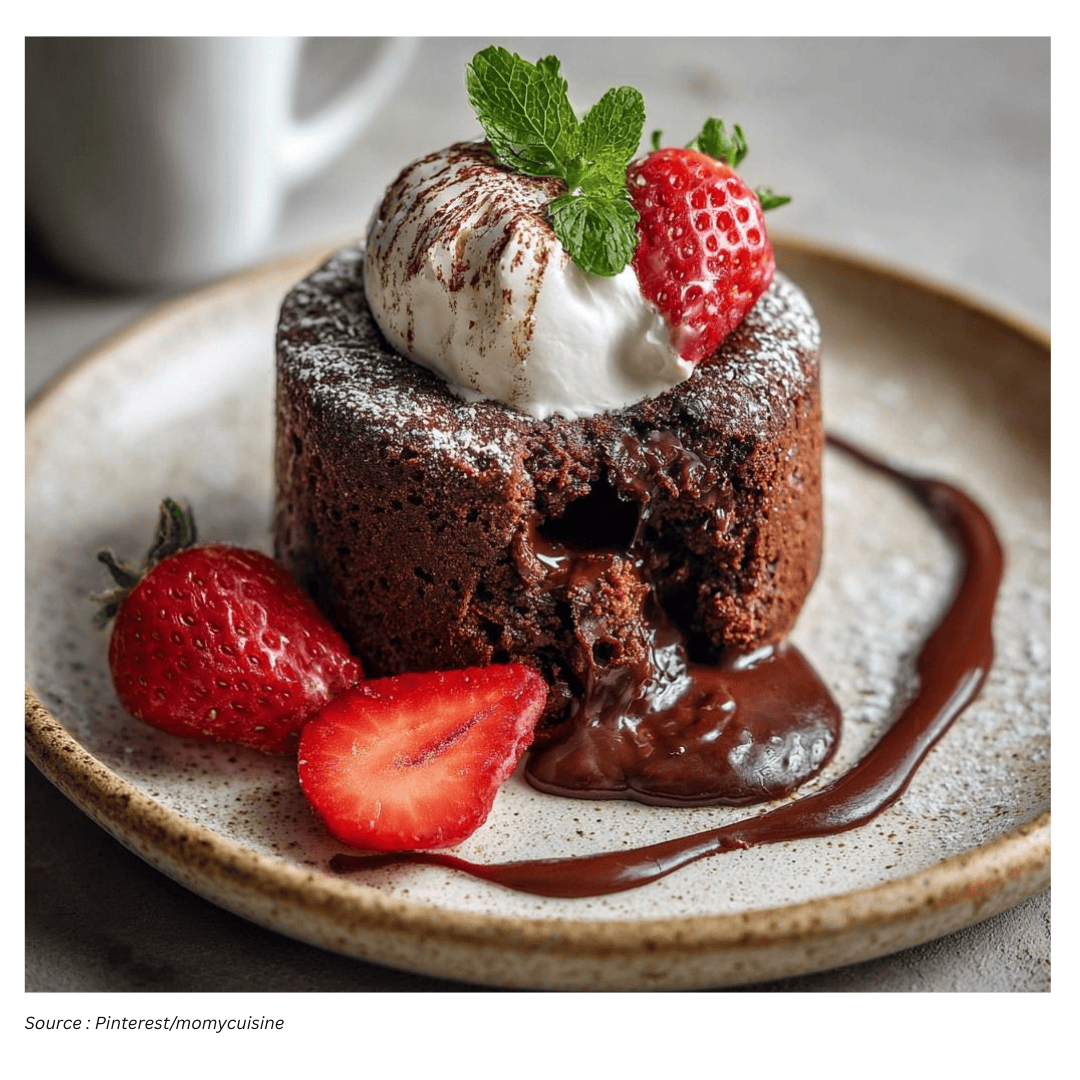
Chocolate molten lava cakes have a reputation for being the kind of dessert you only order out: glossy, dramatic, and seemingly technical, with a center that spills out like warm ganache when you cut in. That visual payoff is part of the appeal—especially for celebrations and intimate dinners—yet the method is far more approachable than many people assume.
Developer Katie Rosenhouse describes molten chocolate cakes as a dessert that looks “incredibly impressive and difficult to pull off,” while being “surprisingly simple to pull together” and “even easier to customize based on flavors you love.” Her version is built around rich, bittersweet chocolate and a straightforward batter that bakes quickly in individual ramekins. The result is intentionally over-the-top: a set exterior with a soft, molten center that delivers the signature “lava” moment.
Because the recipe yields six individual servings, it works just as well for a dinner party as it does for a romantic evening. The key is understanding what you’re aiming for in the oven: edges that are baked and stable, with a center that remains slightly underdone and jiggly so it stays fluid when unmolded.
What you need: a short list of staples plus optional finishing touches
One reason this dessert is so doable is the ingredient list. Many of the essentials are common fridge and pantry items, and the optional additions are more about presentation and pairing than structural necessity.
- Butter
- All-purpose flour
- Bittersweet chocolate chips
- Vanilla bean paste
- Eggs
- Granulated sugar
- Kosher salt
From there, you can keep things classic or build a plated dessert experience with sauces and garnishes. Rosenhouse suggests optional additions such as chocolate hazelnut spread or fruit jams for pairing, plus fresh berries and confectioners’ sugar for a finishing touch. Ice cream is another serving option if you want a hot-and-cold contrast on the plate.
Equipment and setup: ramekins matter
Molten lava cakes are typically baked in small ramekins, which helps them bake quickly and evenly while holding their shape. This recipe uses six 4-ounce ramekins. Preparing them properly is not a minor detail—it’s what allows you to flip each cake out cleanly for that restaurant-style presentation.
Start by greasing the ramekins generously with butter, then coating them lightly with flour and shaking out the excess. This butter-and-flour layer acts as insurance against sticking, especially because the cakes are meant to be tender and moist. If a cake resists unmolding later, you still have a graceful backup: serve it directly in the ramekin.
Step-by-step method: from batter to “lava”
The process is designed to be manageable even if you’re making it for the first time. The broad flow is: prep the ramekins, combine the chocolate mixture, whip eggs and sugar until thick and airy, fold everything together gently, then bake hot and fast.
Here is the method as outlined in the recipe:
- Grease six 4-ounce ramekins generously with butter, coat them lightly with flour, and shake out excess.
- Take the pan off the heat, add the chocolate and vanilla, and stir until smooth. Set aside.
- Beat the eggs and sugar until thickened and doubled in volume.
- Fold in the chocolate mixture, 3 tablespoons of flour, and salt until uniform.
- Divide the batter between ramekins and bake for 10–12 minutes or until the edges are set but the centers are slightly jiggly.
- In the meantime, prepare the plates with chocolate hazelnut spread, fruit coulis, or any other sauces, as desired.
- Flip one ramekin at a time onto plates and unmold. (Run a small paring knife around the edges to loosen, if needed.)
- If desired, dust with confectioners’ sugar and garnish with berries and ice cream.
Even though the steps are simple, two moments deserve extra attention: the whipping of the eggs and sugar, and the folding. The batter’s structure depends heavily on the air you build during beating, so it’s worth taking your time until the mixture is visibly thicker and increased in volume. Then, when folding in the chocolate mixture, flour, and salt, the goal is to keep as much of that air as possible while still ending up with a uniform color and texture.
Why the oven temperature is so high
This dessert relies on a specific baking strategy: high heat for a short time. Rosenhouse recommends preheating the oven right away and setting it to 450 F. That temperature can look aggressive on paper, but it’s central to the molten effect.
As Rosenhouse explains, “While 450 F might seem high, the cakes need that burst of heat to bake and set along the edges before the centers lose their molten quality.” In other words, the outer ring needs to firm up quickly to create a stable shell, while the center stays soft and underbaked enough to flow.
Because timing is tight—10 to 12 minutes—the best approach is to treat the bake as a window rather than a fixed number. You’re watching for set edges and a center that still has a slight jiggle. That jiggle is a feature, not a flaw.
How to tell when lava cakes are done
Molten cakes can be tricky because the doneness you want is not the doneness you’re trained to look for in most baking. Here, you’re intentionally stopping before the center is fully set.
Rosenhouse’s guidance is practical: a toothpick inserted around the edge should come out clean when the cakes are ready, but a toothpick inserted into the middle will still be wet—and that’s exactly what you want. Visually, the edges should look baked and stable, while the center remains slightly jiggly.
If you’re nervous about overbaking, remember that the cakes will continue to set a little from residual heat after they come out of the oven. That’s another reason to avoid waiting until the center looks fully firm.
Unmolding without stress (and what to do if one sticks)
Part of the lava cake experience is the reveal: turning the ramekin over and lifting it away cleanly. Proper greasing and flouring go a long way, but even with good prep, a cake can occasionally cling to the sides.
If that happens, the fix is simple. Run a small paring knife around the edges to loosen the cake, then try again. And if it still doesn’t release easily, serving the cake in the ramekin is a perfectly acceptable—and still elegant—option. The molten center and toppings will do the heavy lifting.
Flavor variations: keep the structure, change the personality
Rosenhouse’s recipe is designed to let bittersweet chocolate take the lead, producing a rich, classic molten cake. But the same framework can support a range of flavor directions, as long as you keep the core method intact.
Chocolate choice is one of the simplest levers to pull. Rosenhouse suggests that if you prefer a more bitter finish, you can opt for darker chocolate (70% and up). If you want something sweeter, milk chocolate is an option. These swaps shift the overall balance without changing the fundamental technique.
Vanilla bean paste is the primary flavoring agent in the base recipe, but Rosenhouse notes it can be swapped for other accents. Options she recommends include espresso powder, orange zest, or a splash of Grand Marnier or bourbon for a boozy touch. Spices are another route to added depth: cinnamon, nutmeg, or chile powder can introduce warmth or gentle heat while keeping the chocolate center stage.
A practical hack for a guaranteed molten center
Even with careful timing, molten cakes can sometimes bake a touch longer than intended—especially if you’re juggling other parts of a meal. Rosenhouse offers a smart workaround that builds in extra insurance for the “lava” effect.
Her suggestion: freeze store-bought truffles until firm, then press one into the center of each cake right before baking. The truffle can be any type you love—caramel, white chocolate, peppermint, and more. Because the truffle starts cold and solid, it helps ensure the center stays wet and luscious even if the cakes spend an extra minute or two in the oven. It can also add a secondary flavor note without requiring changes to the batter.
Serving ideas: sauces, berries, sugar, and ice cream
Molten lava cakes can be served simply—warm cake, warm center, nothing else—but they also lend themselves to a composed plate. The recipe suggests prepping plates while the cakes bake, using chocolate hazelnut spread, fruit coulis, fruit jams, or other sauces as desired. This not only adds flavor contrast, it also makes the dessert look more finished when you unmold the cake on top.
For garnish, confectioners’ sugar and fresh berries provide a classic look and a bright counterpoint to the richness of chocolate. Ice cream is another optional addition, especially if you want a temperature contrast and a creamy element alongside the warm cake.
Key takeaways for consistent results
- Preheat early and bake hot: 450 F is essential for set edges and a molten center.
- Prep ramekins thoroughly with butter and flour to support clean unmolding.
- Beat eggs and sugar until thickened and doubled in volume for structure.
- Fold gently to keep the batter airy, but mix until the color is uniform.
- Use visual cues: set edges, slightly jiggly center; clean toothpick at the edge, wet in the middle.
- If you want extra insurance, press a frozen truffle into the center before baking.
With these techniques, chocolate molten lava cakes become less of a special-occasion gamble and more of a reliable go-to—one that looks dramatic on the plate, tastes deeply chocolatey, and still fits into a home cook’s schedule. Whether you keep it classic with bittersweet chocolate and vanilla or customize with espresso, citrus zest, spice, or a truffle center, the core promise remains the same: a warm cake with a truly molten heart.