
Beef Biryani: A Layered Indian Rice Dish with Tender Beef, Spices, and Fried Onions
An aromatic beef biryani built in layers
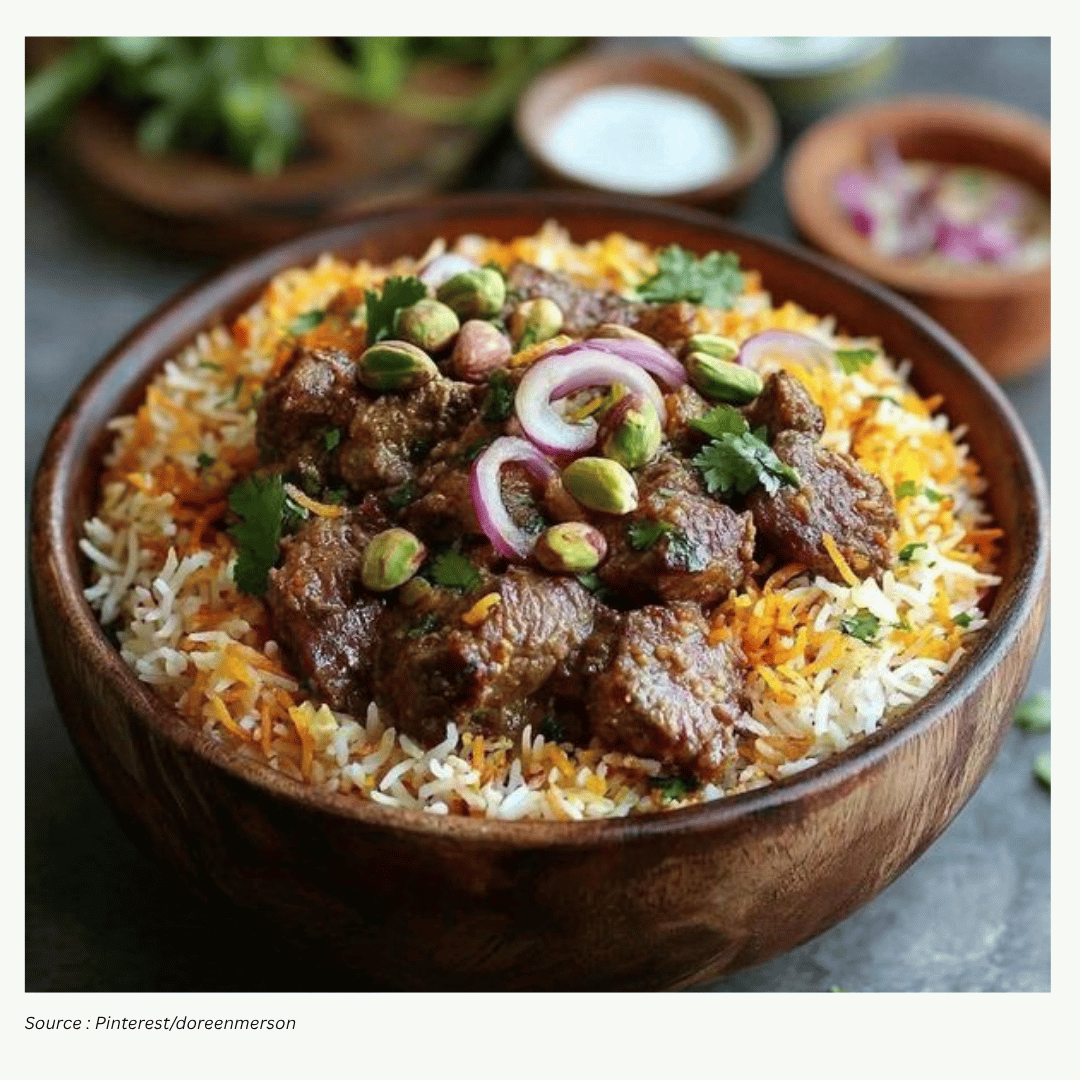
Beef biryani is the kind of meal that announces itself the moment it hits the table: fragrant rice, warming spices, sweet caramelized onions, and tender beef coming together in one layered bake. Biryani is widely known as a rice dish that stacks flavors rather than simply mixing them—rice on top, a richly seasoned protein underneath, and a finishing layer of fried or caramelized onions that perfumes the whole pot.
This particular approach keeps the spirit of classic biryani while switching the usual chicken for beef. The result is a hearty, satisfying dish that feels special enough for a gathering but straightforward enough to make when you want a complete meal from one pot and one baking dish. The beef is simmered until tender, the rice is partially cooked, and then everything is finished together in the oven so the layers meld without turning mushy.
Why beef works so well in biryani
Biryani is often associated with chicken, but it’s not limited to one protein. It can be made with other options as well, including lamb or fish. Using beef changes the character of the dish in a good way: the meat brings a deeper, savory base that stands up to the spices and the sweetness of caramelized onions. When simmered patiently in a spiced sauce, the beef becomes tender and “melt in your mouth,” which is exactly what you want when it’s paired with fluffy rice.
The overall effect is what many people look for in Indian-inspired cooking: a concentrated, layered flavor profile where each bite includes multiple notes—savory, aromatic, lightly tangy from yogurt, and sweet from onions and raisins.
Flavor profile: warming, not fiery
One common question about biryani is whether it’s spicy. In this version, the dish is not spicy in the sense of being hot or sweat-inducing. Instead, it has a gentle warmth—spices that build aroma and depth without overwhelming heat. That makes it approachable for a wide range of diners while still delivering the “flavor bomb” experience that biryani is known for.
Key components that make the dish
Even without listing every ingredient, the structure of this beef biryani is clear: it relies on a few essential building blocks that are assembled in stages. Each stage has a purpose, and together they create the final texture and aroma.
- A blended sauce: A set of sauce ingredients are combined in a food processor and reserved. This becomes the backbone of the simmering liquid for the beef.
- Caramelized onions (with raisins): Onions are cooked in butter until caramelized, then raisins are added. This mixture provides sweetness and a signature biryani aroma.
- Browned beef: The beef is browned in butter to develop savory depth before it simmers.
- Spices, yogurt, and broth: Spices are added to the sauce, followed by yogurt and some beef broth, creating a rich, tangy, spiced gravy for the beef to cook in.
- Partially cooked rice: Rice is cooked briefly in broth—only about 5 minutes—then drained while still undercooked, so it can finish in the oven without becoming overdone.
- Oven finishing: The dish is baked at 350°F for 30 minutes, allowing the rice to steam to doneness and absorb flavor from the beef layer beneath.
How the cooking method comes together
What makes this biryani method reliable is that it separates the cooking of the beef and the rice until the final stage. Beef needs time to become tender; rice needs careful timing so it stays fluffy. By simmering the beef first and only partially cooking the rice, you can bring both components to their ideal texture at the same time in the oven.
Here’s how the process flows from start to finish, in practical terms:
- Step 1: Build the sauce. Combine the sauce ingredients in a food processor and set the mixture aside so it’s ready when the beef is browned.
- Step 2: Caramelize the onions. Melt butter in a Dutch oven over medium heat, add onions, and cook until caramelized. Once the onions have developed their sweetness and color, add raisins. Set this mixture aside for layering later.
- Step 3: Brown the beef. Add the remaining butter over medium-high heat and brown the beef. Browning adds depth and helps the beef hold its texture during the simmer.
- Step 4: Simmer the sauce. Remove the beef, add the prepared sauce to the pot, and bring it to a simmer. This step starts building the base of the dish right in the same cooking vessel.
- Step 5: Season and enrich. Add spices to the simmering sauce, then stir in yogurt, some beef broth, and the browned beef. Simmer for about an hour, giving the beef time to become tender and the sauce time to develop.
- Step 6: Par-cook the rice. While the beef simmers, cook the rice in broth for about 5 minutes. The rice will still be raw in the center at this point, which is intentional. Drain the liquid promptly so the grains don’t overcook.
- Step 7: Layer and bake. Add the drained rice on top of the beef mixture, then top with the caramelized onions. Bake at 350°F for 30 minutes.
- Step 8: Mix and serve. Once baked, mix everything together so the rice and beef are evenly distributed, then serve.
The importance of timing the rice
The rice step is one of the most important details in this method. Instead of fully cooking the rice on the stove, it’s treated more like pasta: boiled briefly, then drained while still undercooked. Using this traditional boiling approach, the rice typically needs only 4 to 5 minutes.
Draining on time matters because the rice finishes cooking in the oven. If it’s left too long in the boiling liquid, it can become too soft after baking. If it’s drained promptly, it will absorb flavor and steam to a fluffy texture during the final bake.
Equipment considerations
Equipment can influence how this dish turns out, especially because biryani relies on even heat and a vessel that can move from stovetop to oven. The method described uses a Dutch oven for caramelizing onions, browning beef, and simmering the sauce. This helps keep flavor concentrated and reduces the need to transfer between multiple pots during the early stages.
Beyond that, the key idea is to use equipment that supports steady simmering and even baking so the beef becomes tender and the rice cooks through without drying out.
Serving ideas: make it a complete meal
Beef biryani is filling enough to stand on its own, thanks to the combination of rice and protein. Still, it pairs well with classic sides that complement its richness and aromatics. Homemade naan is a natural match, especially if you like using bread to scoop up the saucy bits from the bottom of the pot. Cooling sides also work well alongside the warm spices.
- Homemade naan
- Onion raita
- Kachumber salad
These sides keep the overall meal balanced: bread for comfort, raita for a cool contrast, and salad for freshness and crunch.
Storage and leftovers
This dish is well-suited to leftovers, which is helpful given that biryani is often made for sharing or meal prep. Once cooled, store leftovers in an air-tight container in the refrigerator for 2 to 3 days. For longer storage, it can be frozen for up to 3 months.
Because biryani is a layered rice dish that’s mixed before serving, leftovers tend to reheat into a cohesive, flavorful rice-and-beef mixture—still aromatic, still satisfying, and often even more unified in flavor after resting.
Variations and flexibility
Like many home-cooked recipes, this beef biryani can be adjusted to suit what you have and how you like to cook. The core identity of the dish—layers of rice, spices, fried onions, and a simmered protein—remains the same even when small details change.
One simple way to think about variations is to focus on the framework rather than any single ingredient: a spiced sauce, tender meat, par-cooked rice, and a final bake to bring it all together. As long as those steps are respected, the dish keeps its biryani character.
A practical summary for home cooks
If you want a biryani that’s aromatic, warm with spices (but not hot), and structured around tender beef, this method is designed to deliver. The workflow is also friendly to home kitchens: you build flavor in stages, keep the rice fluffy by par-cooking it briefly, and rely on the oven to finish the dish evenly.
The final result is a complete meal with a distinct layered identity—fluffy rice on top, rich beef underneath, and caramelized onions tying everything together—ready to serve as-is or alongside naan, onion raita, or a simple salad.